The Chimera Golf Club was designed in 2003 by Ted Robinson Jr. The 6,757-yard layout boasts forgiving fairways and a playable desert landscape which provides a fair challenge from any set of tees. The natural terrain and unparalleled views of the Las Vegas Strip make Chimera Golf Club an incredible place to enjoy a round. Begin your day warming up on the driving range with unobstructed views of the Strip, Downtown Vegas, and snow-capped Mt. Charleston before hitting the course.
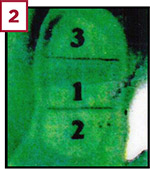
This first hole is a narrow Par 4 can be cut down to size with a long drive that finds the friendly downslope in the fairway. A well-managed short approach from a downhill lie leaves a nice birdie opportunity to open the front nine.

Pin holes rotate daily.
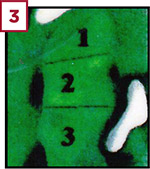
The fairway on this medium length Par 5 slopes significantly from left to right. The green is reachable in two for long hitters however you must avoid the gigantic bunker on the left. The putting surface is deep, narrow, and slopes hard from back to front.
Pin holes rotate daily.
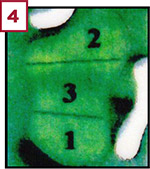
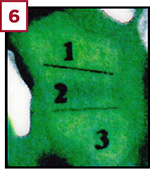
Club selection is at a premium on this short Par 4. You must find the fairway and steer clear of the large bunker on the left and the desert to the right and short of the green. The second shot can be simple but make sure to not hit your ball too far as a massively deep bunker lurks behind the green.
Pin holes rotate daily.
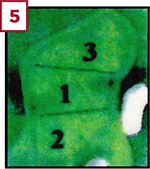
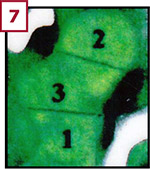
The first of the Par 3s at Chimera can play relatively easy or devastatingly difficult depending on the prevailing winds and hole location. Pay attention to your surroundings and choose the right club or you may be facing your longest putt of the day.
Pin holes rotate daily.
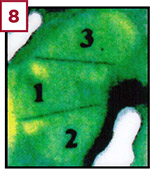
This Par 4 is one of the trickiest holes on the entire course making par a truly exceptional score. Aim left and don’t be fooled by the deceptive look off the tee. Ending up the on the severe mound to the right of the fairway is easy to do and makes for one of the toughest shots on the course. If you are able to find the fairway a slightly uphill second shot awaits into a huge but fair green.
Pin holes rotate daily.
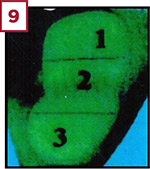
This picturesque Par 3 facing the Sunrise and Frenchman Mountains is the longest at Chimera measuring over 200 yards, from the Pegasus tees. Short and right are safe bailout areas and provide a great chance to save par.
Pin holes rotate daily.
The uphill, potentially drivable Par 4, the 7th gives you an amazing opportunity to record a red number or even make a Hole in One! However, an errant drive to the right or left can turn an easy hole into a nightmare. Considerable contours all around this green invite imagination and creativity into your short game.
Pin holes rotate daily.
Reachable in two, this Par 5 begs for a massive drive as you overlook the amazing mountain ranges in the background. Keeping your tee shot up the left side of the fairway gives you the best angle to attack the well-guarded green. The second shot plays well uphill but if played correctly, you will be rewarded with another exceptional chance to make a birdie.
Pin holes rotate daily.
The finishing hole on the front nine is a difficult Par 4 finishing over water with a breathtaking view of The Strip, Downtown Las Vegas, and Mt. Charleston. A strong drive down the left-center of the fairway is needed to set up a chance to navigate the tough approach shot. A beautiful waterfall runs parallel to the long and undulated green.
Pin holes rotate daily.
Hole 10 at Chimera is an uphill Par 4 that is not as simple as it first appears. You must find the fairway and avoid the two fairway bunkers along the right side. Once safely in play, the second shot needs to be kept below the hole as the green slopes hard from back to front.
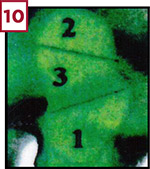
Pin holes rotate daily.
From an elevated tee, this hole offers a spectacular view of the Las Vegas Strip. The longest Par 5 at Chimera, measuring 567 yards from the Pegasus tees, can yield a good score if you are able to hit the fairway. The second shot gives you many options and longer players may even have the opportunity to reach the green. The undulated two-tiered green will test even the strongest putters.
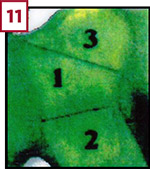
Pin holes rotate daily.
This Par 3 at Chimera is a mid-iron for most players. The seemingly simple hole is defended by the prevailing Vegas winds. Pay attention and choose your club carefully to escape with par or better.
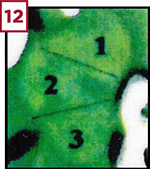
Pin holes rotate daily.
This Par 4’s fairway is much wider than it appears from the tee. Avoiding the fairway bunker on the right with your drive will set up an uphill approach into a massive two-tiered green. Finding the correct shelf on the green is a must for a chance to two-putt. The undulated two-tiered green will test even the strongest putters.
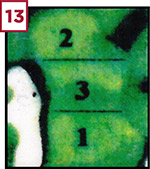
Pin holes rotate daily.
This short and potentially drivable Par 4 tempts you to be aggressive off the tee. Be careful though, deep bunkers and trees await those who fail to find the short grass. One may be wiser to hit a hybrid or long iron and lay up short of the trouble.
Pin holes rotate daily.
Driving is at a premium on this medium length Par 5. Those who find the fairway and avoid the four daunting fairway bunkers will be rewarded with a tremendous opportunity to make a great score. Your second and/or third shot will play well uphill so you must choose the right club to take advantage.
Pin holes rotate daily.
Arguably the toughest test on the course with one of the narrowest fairways. This long Par 4 demands accuracy off the tee to set up a manageable approach. Keep your second shot beneath the hole as the green slopes severely from back to front.
Pin holes rotate daily.
This short Par 3 plays from a slightly elevated tee to a heart-shaped green. Avoiding the berm in front and the waste area behind and right of the green can be tough as the winds swirl in the SE corner of the golf course.
Pin holes rotate daily.
The home hole gives you many options. On this Par 4 feel free to choose driver and flirt with the water to the left on the tee shot or lay back with an iron and deal with the water on the approach. The second shot is one of the most picturesque on the course as you stare at the world-famous Stratosphere behind the green. A par or birdie is quite the achievement and will leave you feeling as if you slain the Chimera!
Pin holes rotate daily.
Need to book over the phone? Give us a call at: (702) 951-1500
Join the Chimera Golf Club insider list! Get the scoop on golf and dining deals, exclusive perks, and can’t-miss events delivered straight to your inbox.
*Required